
How to Install Lightroom Mobile Presets
Hey everyone! This guide shows you how to install Lightroom Mobile presets on the free Lightroom mobile app. There are two main ways to install your new presets, and I’m going to walk you through both, step by step.
If you’ve landed on this page because you’ve purchased WKpresets, then thank you for your purchase and support. If you haven’t heard about WKpresets, and you’re looking for consistency across your work (even social media) then check out this page to find out more about all the ways WKpresets can help you across multiple platforms (LR Classic, LR CC, LR CC Mobile, ACR & even on Instagram with Instagram Story Filters!). With many different preset packs, I’m sure you’ll find one that will work for what you’re after.
Presets are an awesome way to expedite your editing process and maintain consistency throughout all your edits, which is why so many photographers love them. No matter what you specialize in or shoot, you will find yourself relying on presets to speed up your workflow and give your edits a stylized look. Mobile presets are a fun way to give your day-to-day photos that you capture on your phone a little push, and with WKpresets Mobile Pack, you can do that with a few simple clicks, right on your phone.
Two Options to Install Lightroom Mobile Presets
As I mentioned above, there are two ways to install your Lightroom Mobile Presets.
Option 1 — Using DNG files. This option takes a few steps, but I believe this would be the best way to install lightroom presets if you don’t want to pay for a subscription and keep on using the free mobile version. If you’re already paying for LR CC, then go with option 2; it’s easier!
Option 2 — Using XMP files. This option is done through your Lightroom CC on your desktop, and it goes through your Lightroom Cloud Subscription.
It doesn’t really matter which option you go with, because the end result is the same, so let’s get started.
Option 1: How to Install Lightroom Mobile Presets
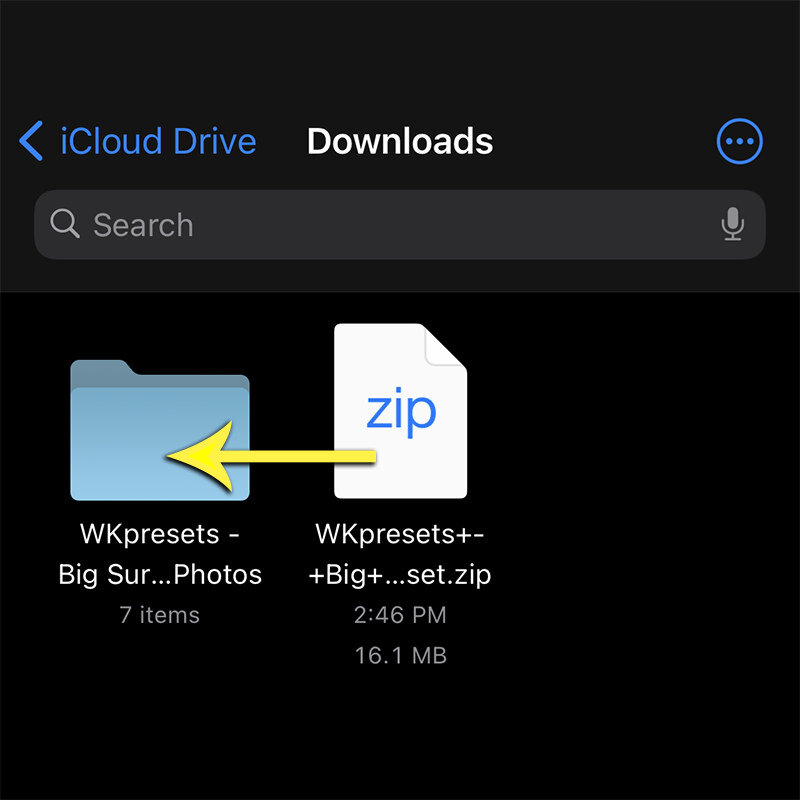
Step 1: Unzip the files
The first thing that you’ll need to do is download & unzip the “WKpresets - Big Sur” file. This step is best done on your computer. It’s possible to do it directly on your phone but it might need 3rd party app to unzip folders.
If your phone is able to unzip files, then skip ahead to step 3.
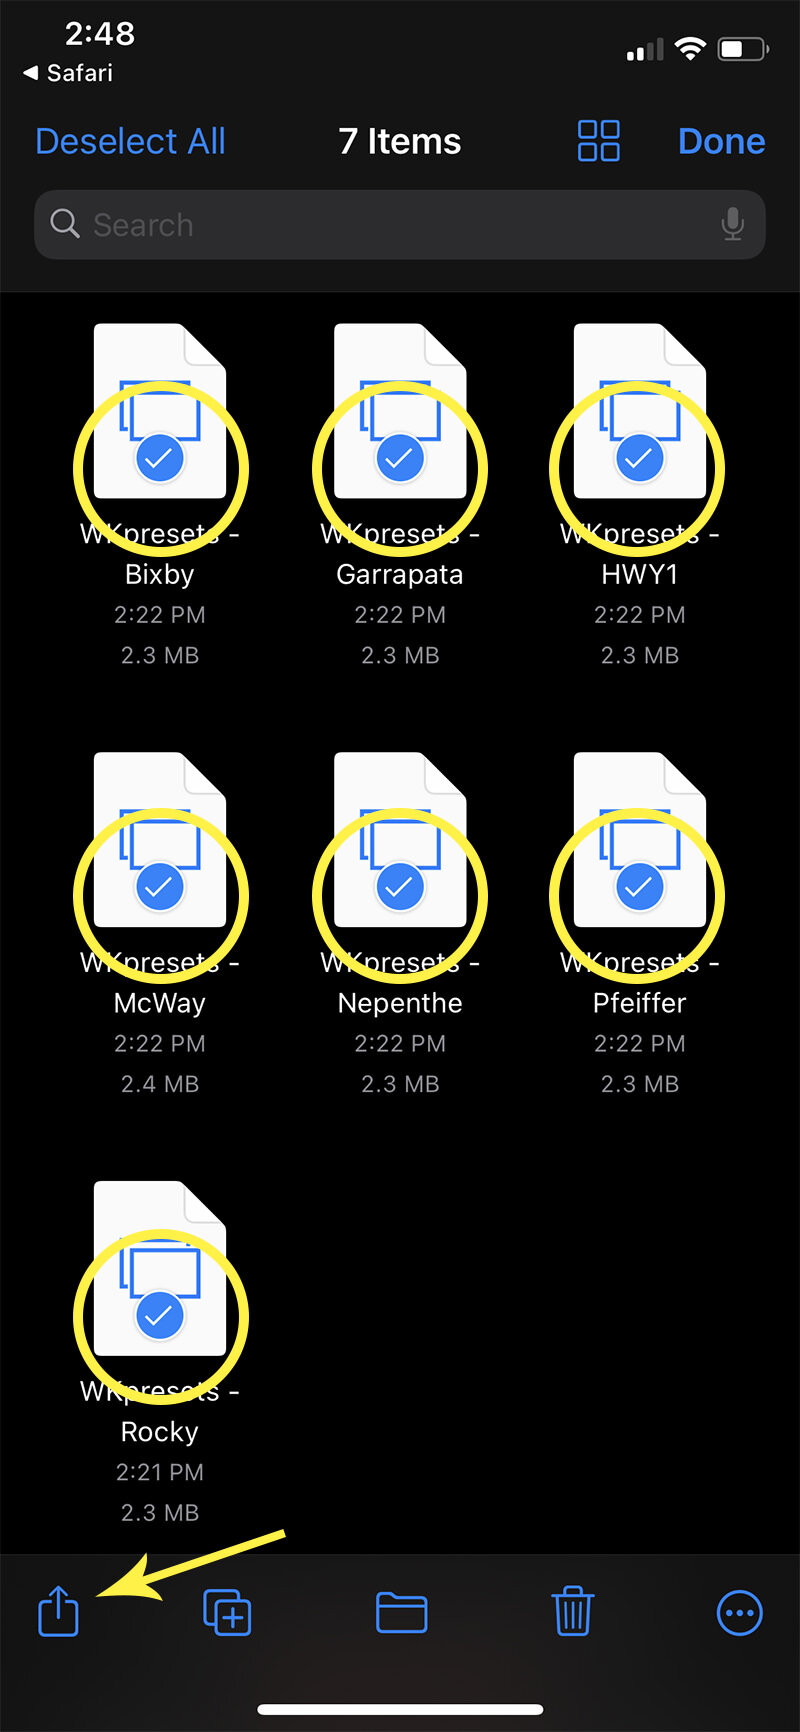
Step 2: Transfer Files
After you’ve unzipped your files, you’ll have 2 folders (.DNG & .XMP). They both contain the same presets, but if you’re on this installation option then use the 7 “.DNG” images for each preset.
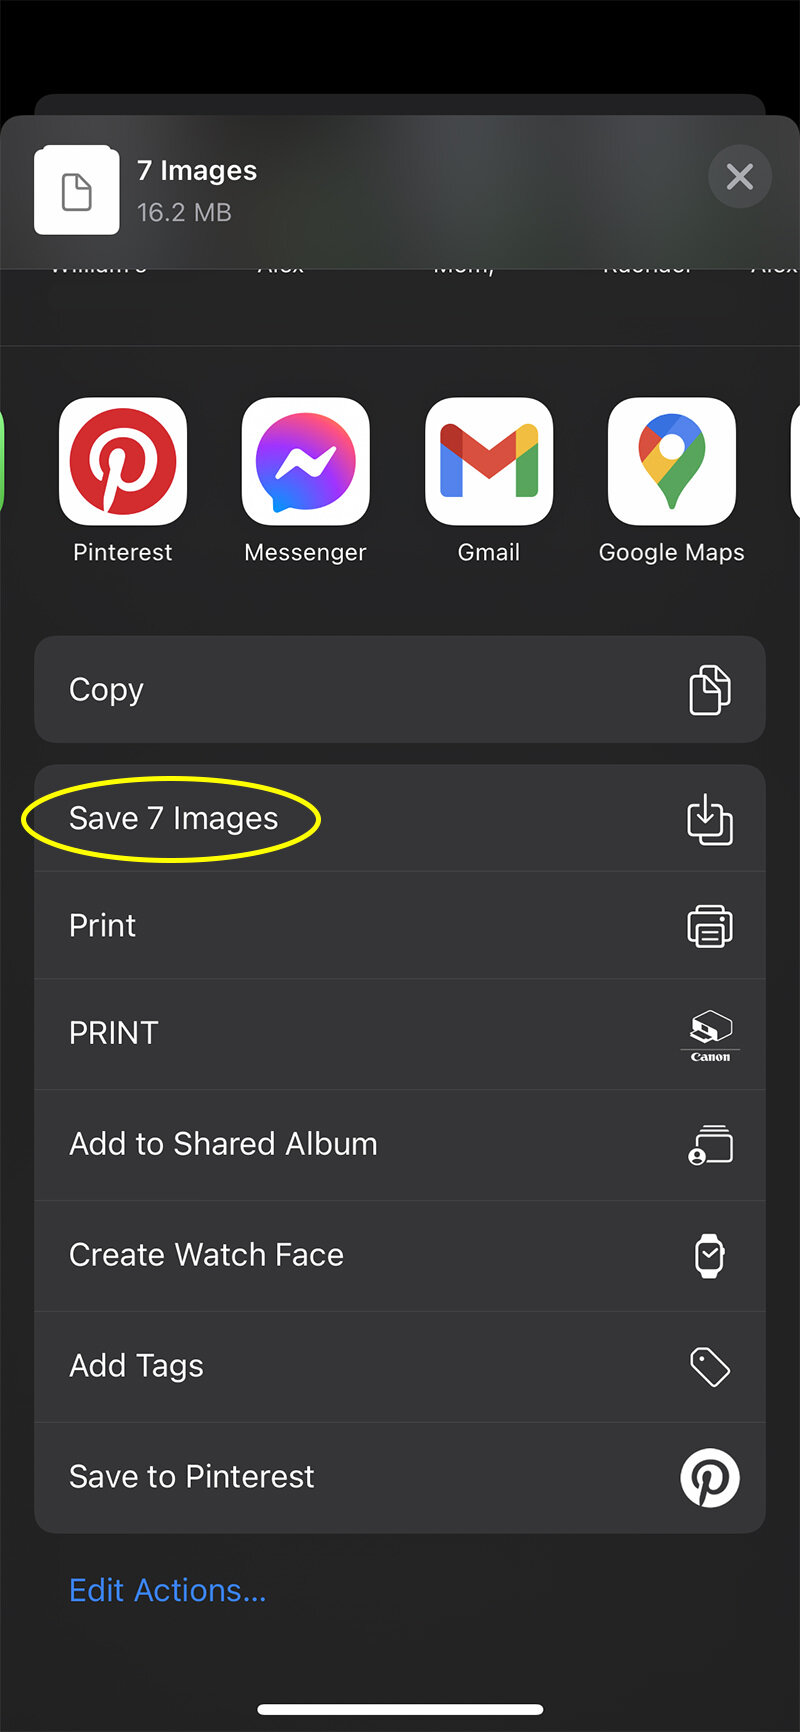
Transfer these files to your phone. The files will appear blank in your camera roll.
Step 3: Lightroom CC
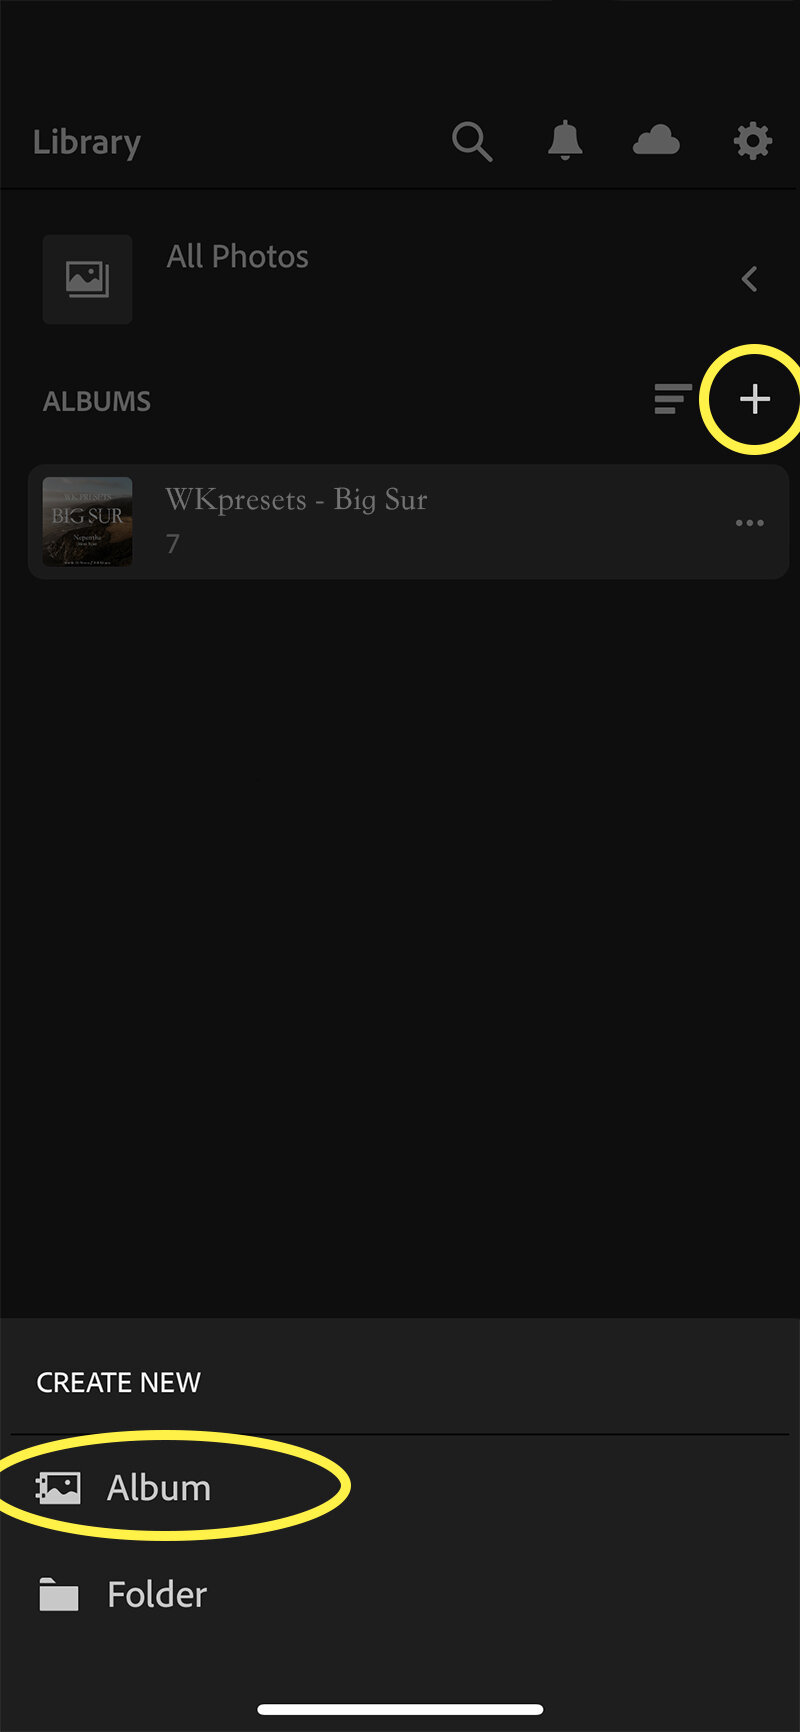
Open the Lightroom app on your phone & select the “Library” tab on the bottom. Create a new Album or select one that already exists.
Step 4: Importing Presets
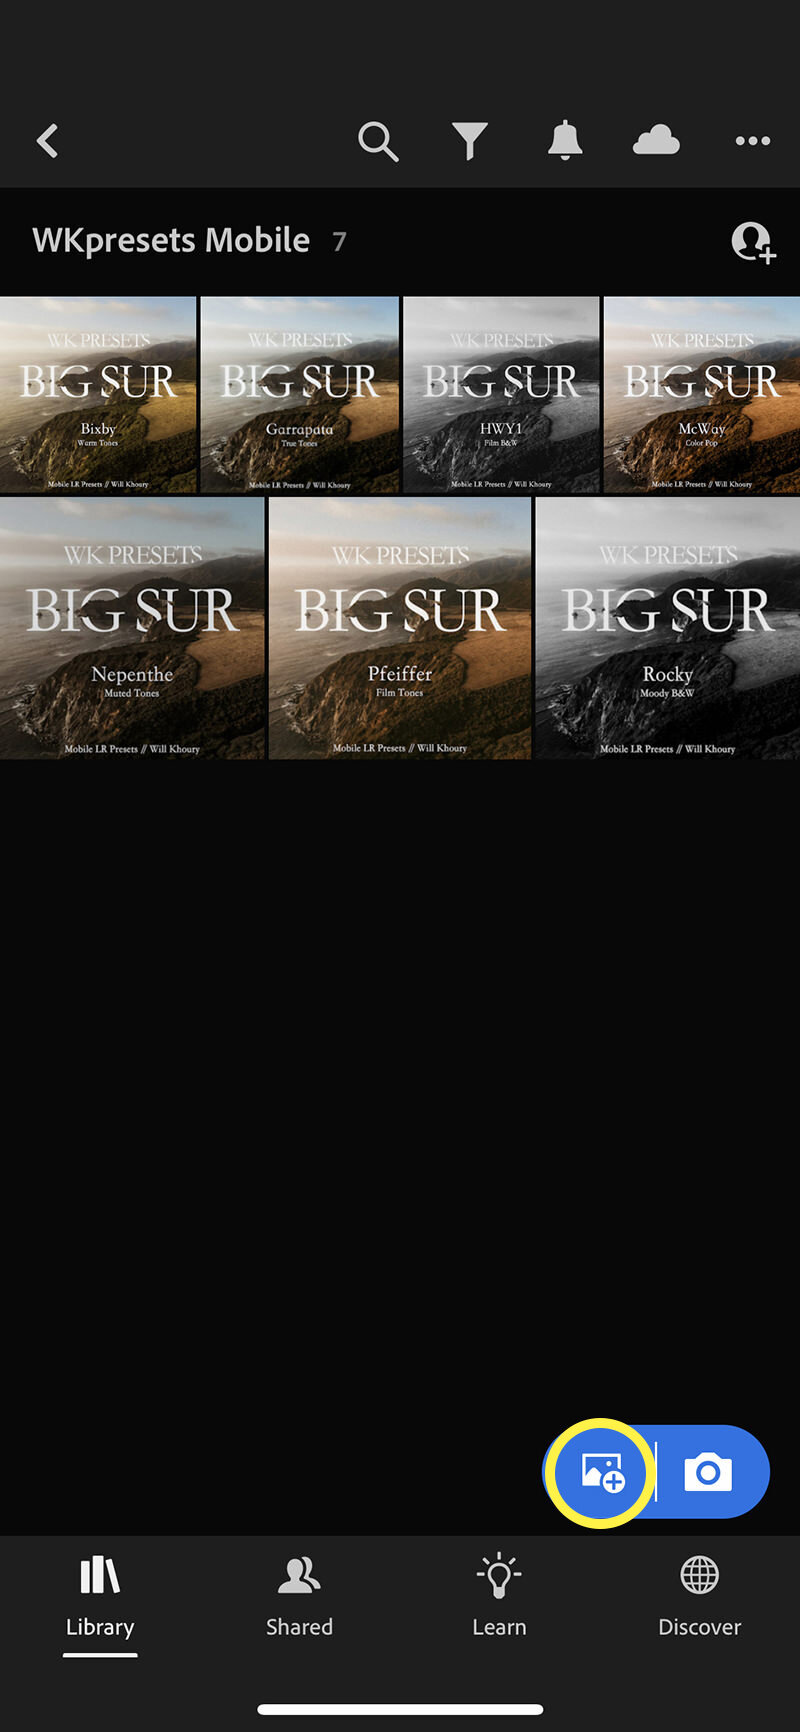
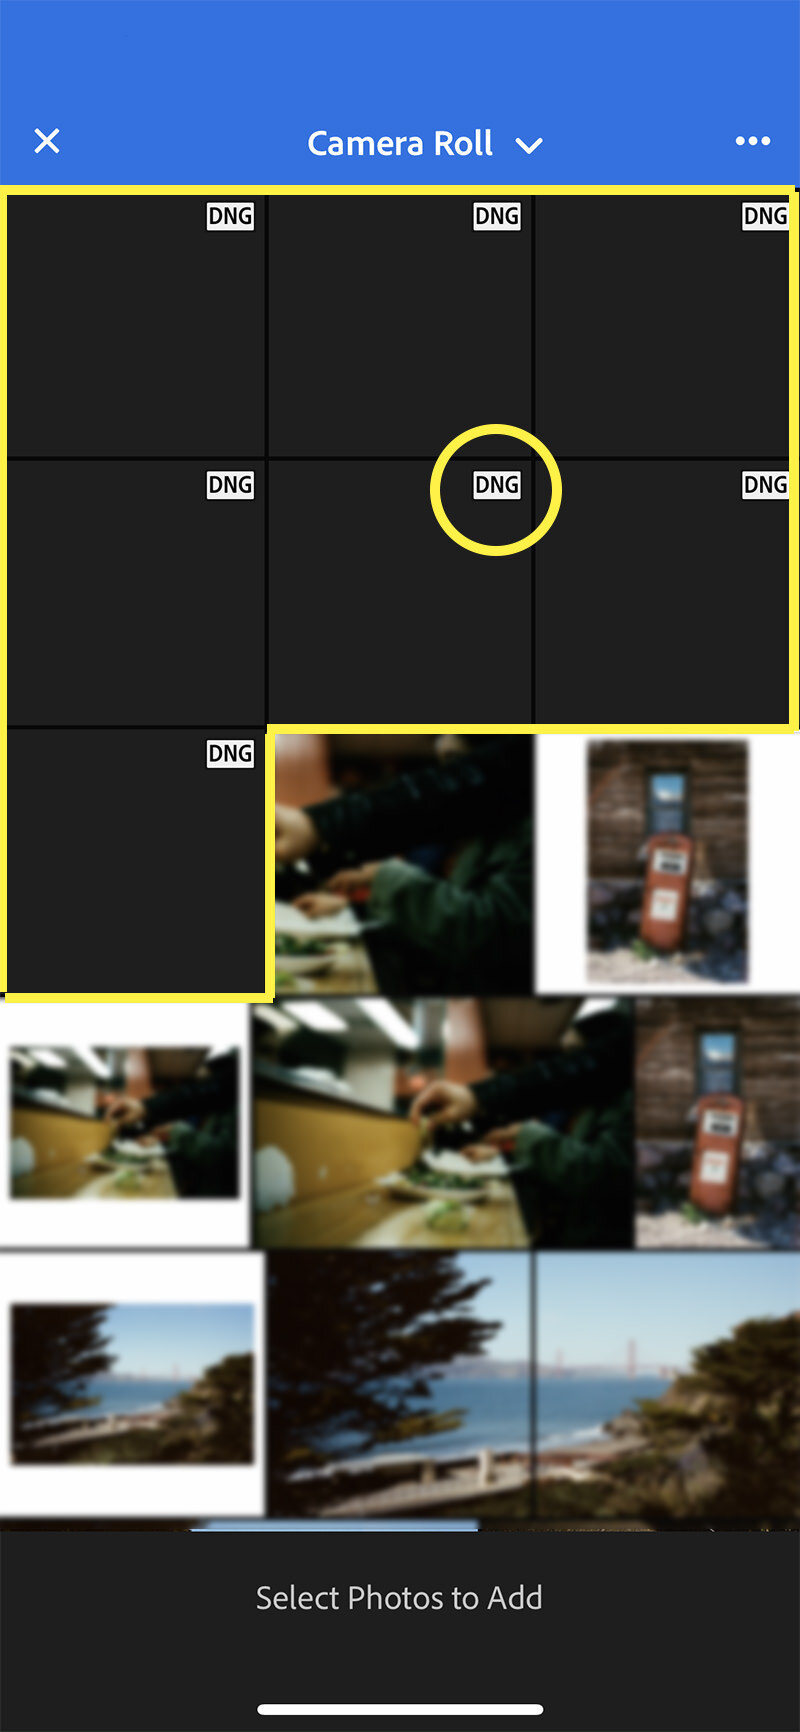
At the bottom right corner (in blue) select the “+” sign to import new photos. Locate the preset files that you transferred to your camera roll. Select all “.DNG” files & “Add” photos to the album.
At this point, you should be able to see 7 photos (Big Sur) that have different tones. (5 color & 2 B&W).
Step 5: Creating Preset Settings
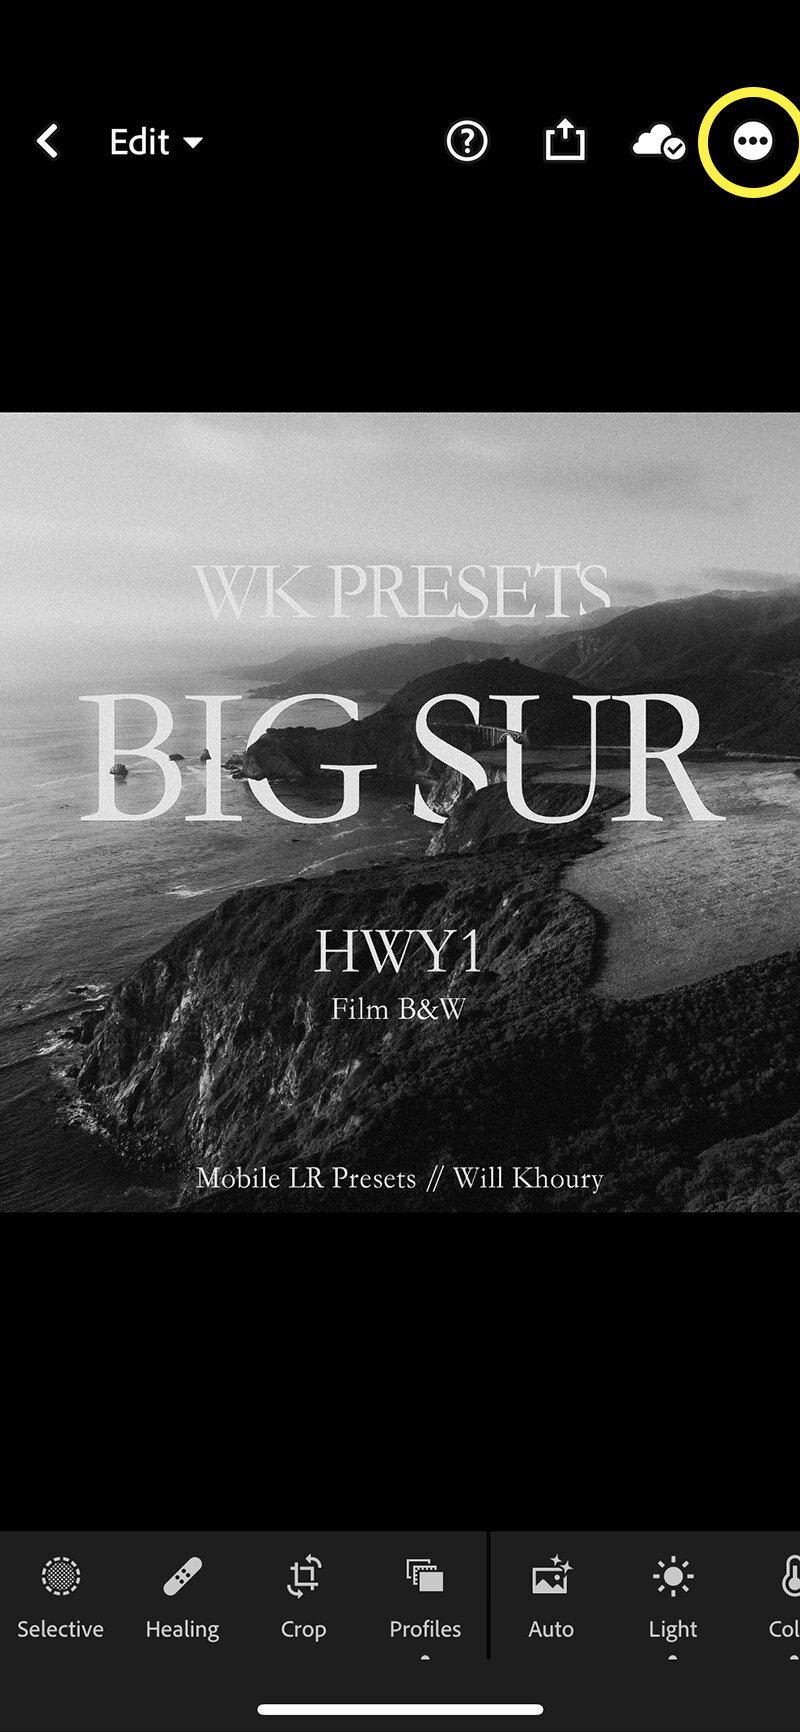
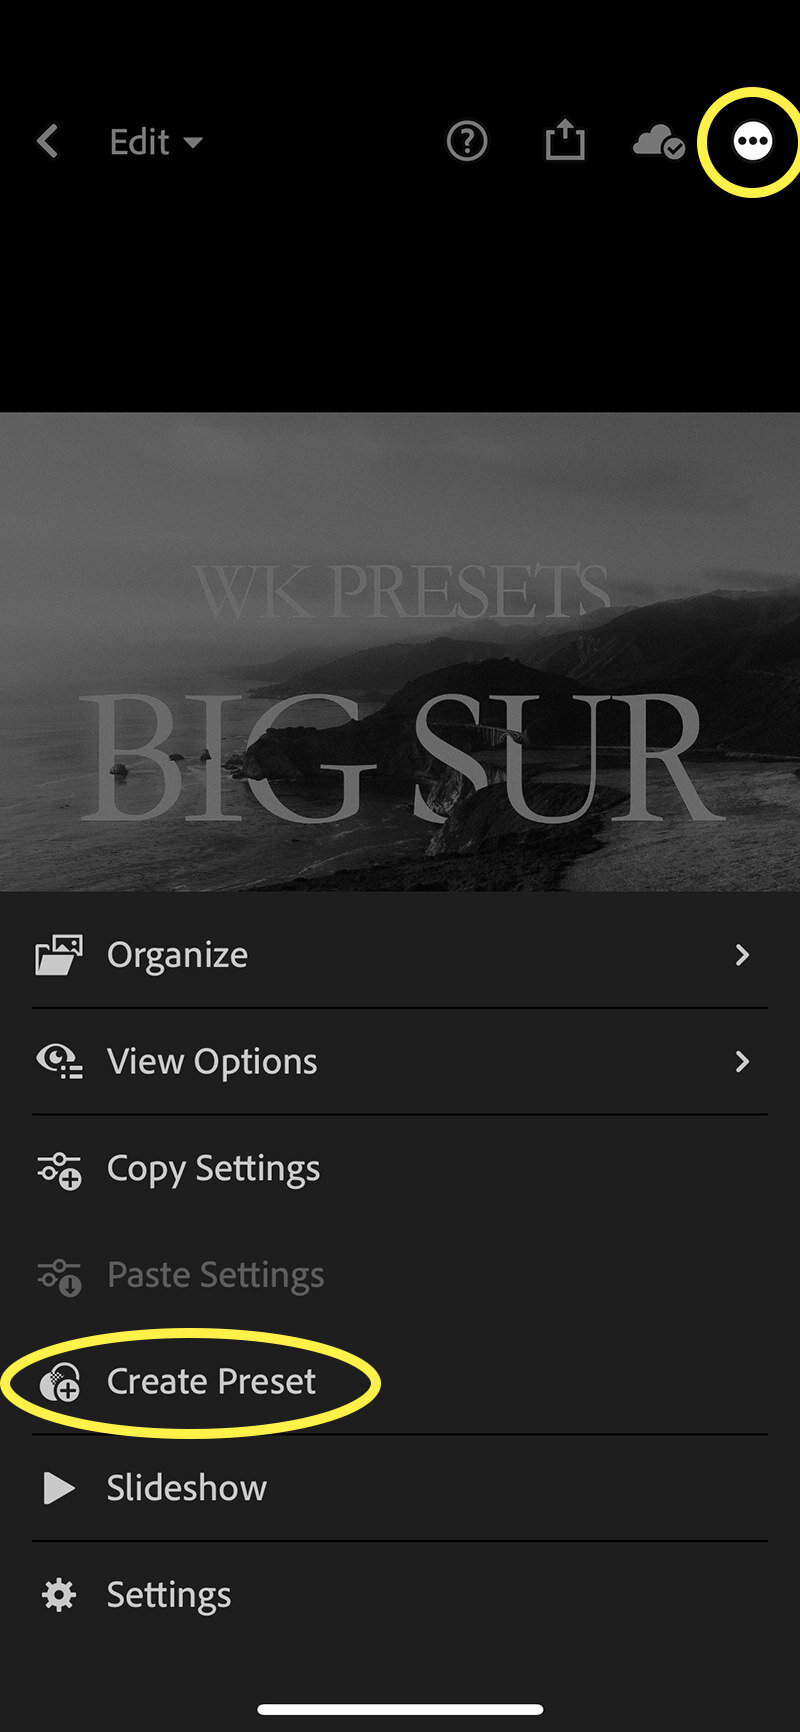
Select one of the photos, this will take you to the “develop” module.
Select the 3 dots on the top right corner “…” A menu will open up.
Select “Create Preset” & a new menu will pop up.
Step 6: Saving Preset Setting
This is the most important step for the presets to work right.
Under “Preset Name” Type in the name of the preset as shown on the image.
For example: “WKpresets - HWY1”Under Preset Group, you can create a group titled “WKpresets - Big Sur/Mobile” to keep all presets together.
Under “Select” Make sure to uncheck Tools, Exposure, White Balance, Optics & Geometry. This part should look like this:
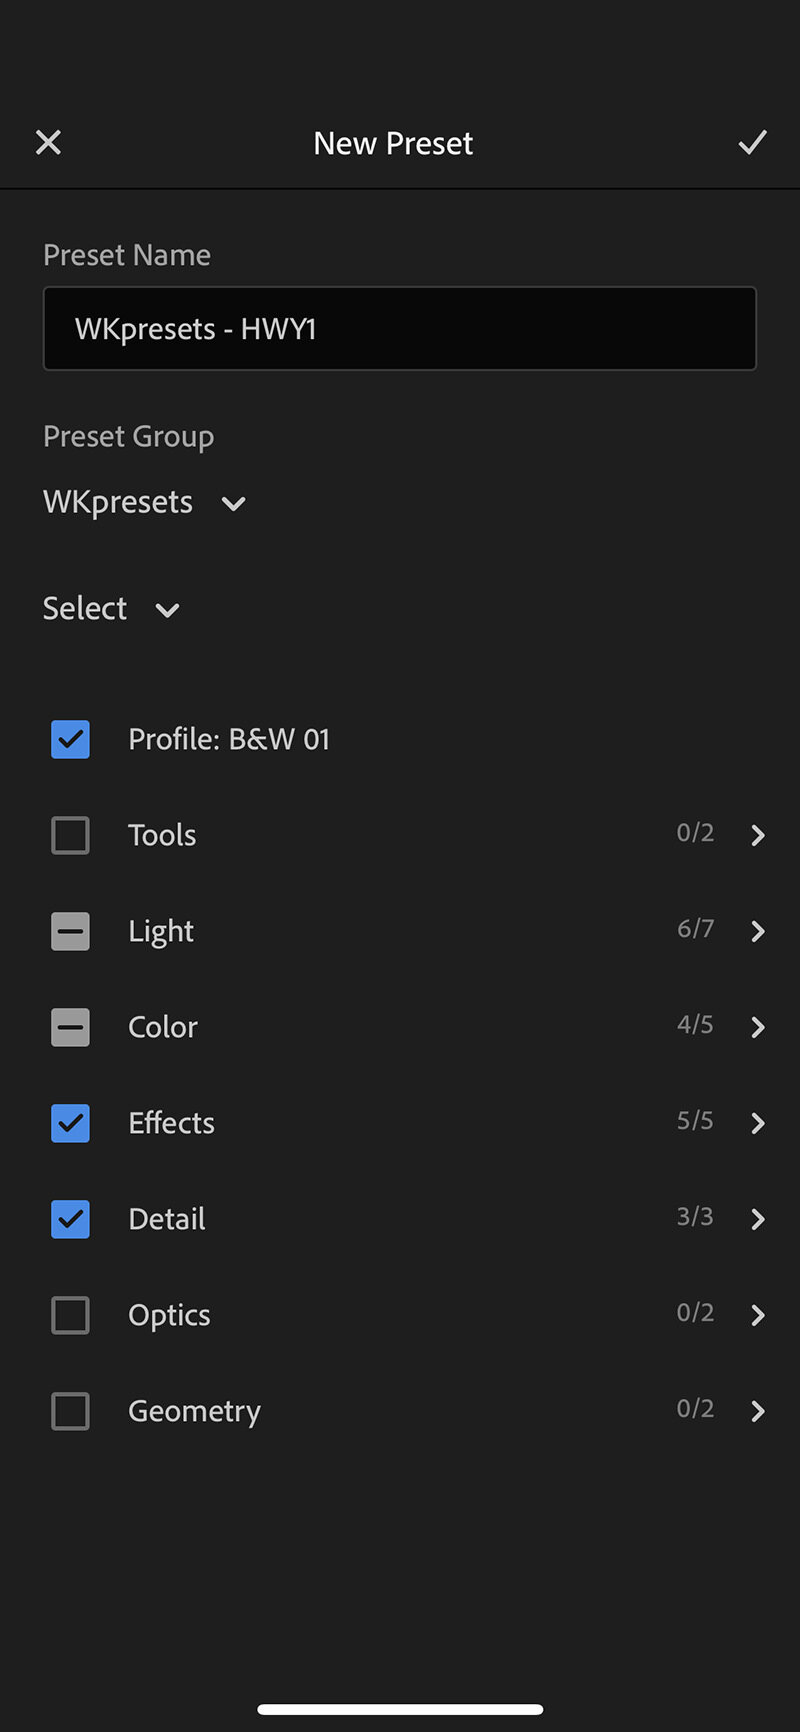
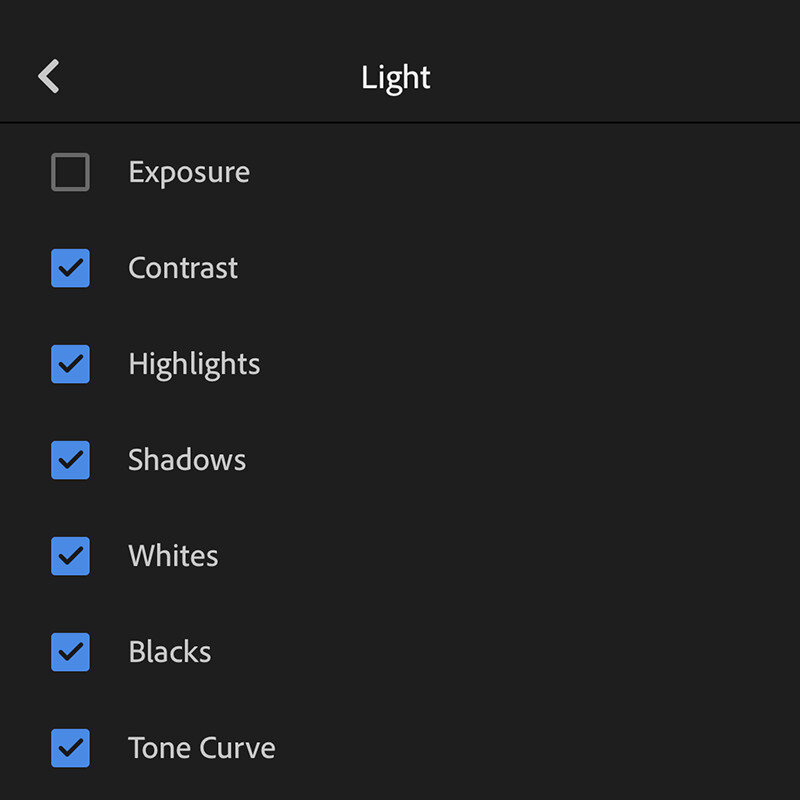
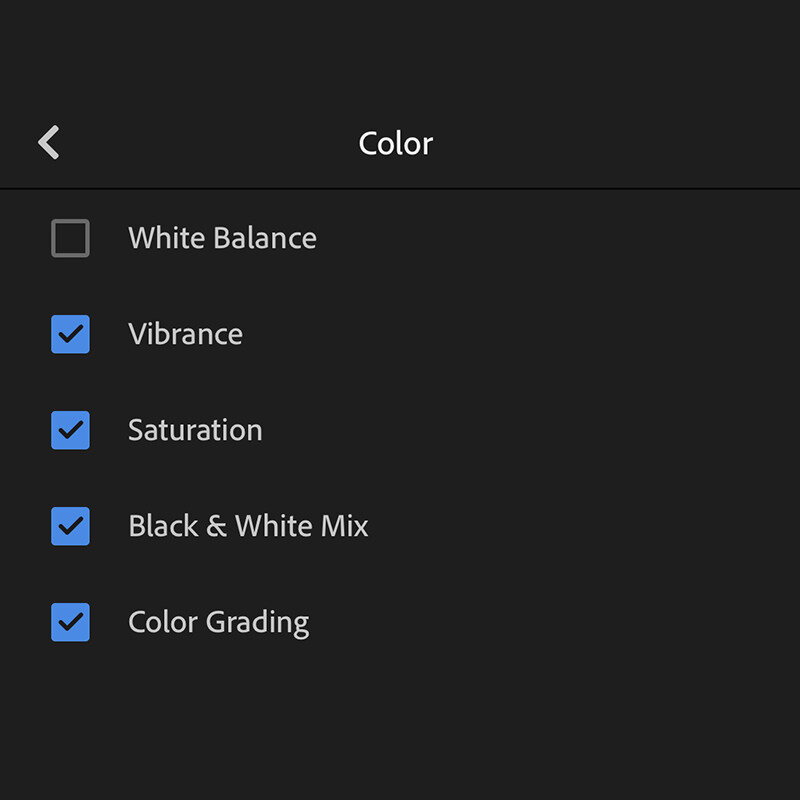
Quick Tip: Exposure & White Balance should be unchecked because I want you to have control over that crucial part of your photo.
Step 7: Adding all presets
Repeat “Step 6” on each photo & create a new preset (not group) from each photo, naming it with the new title.
Step 8: Using WKpresets
Once you’re finished with all these steps, you should be good to go on using WKpresets on any JPEG/HEIC photo from your camera roll.
Import the photo you want to spice up
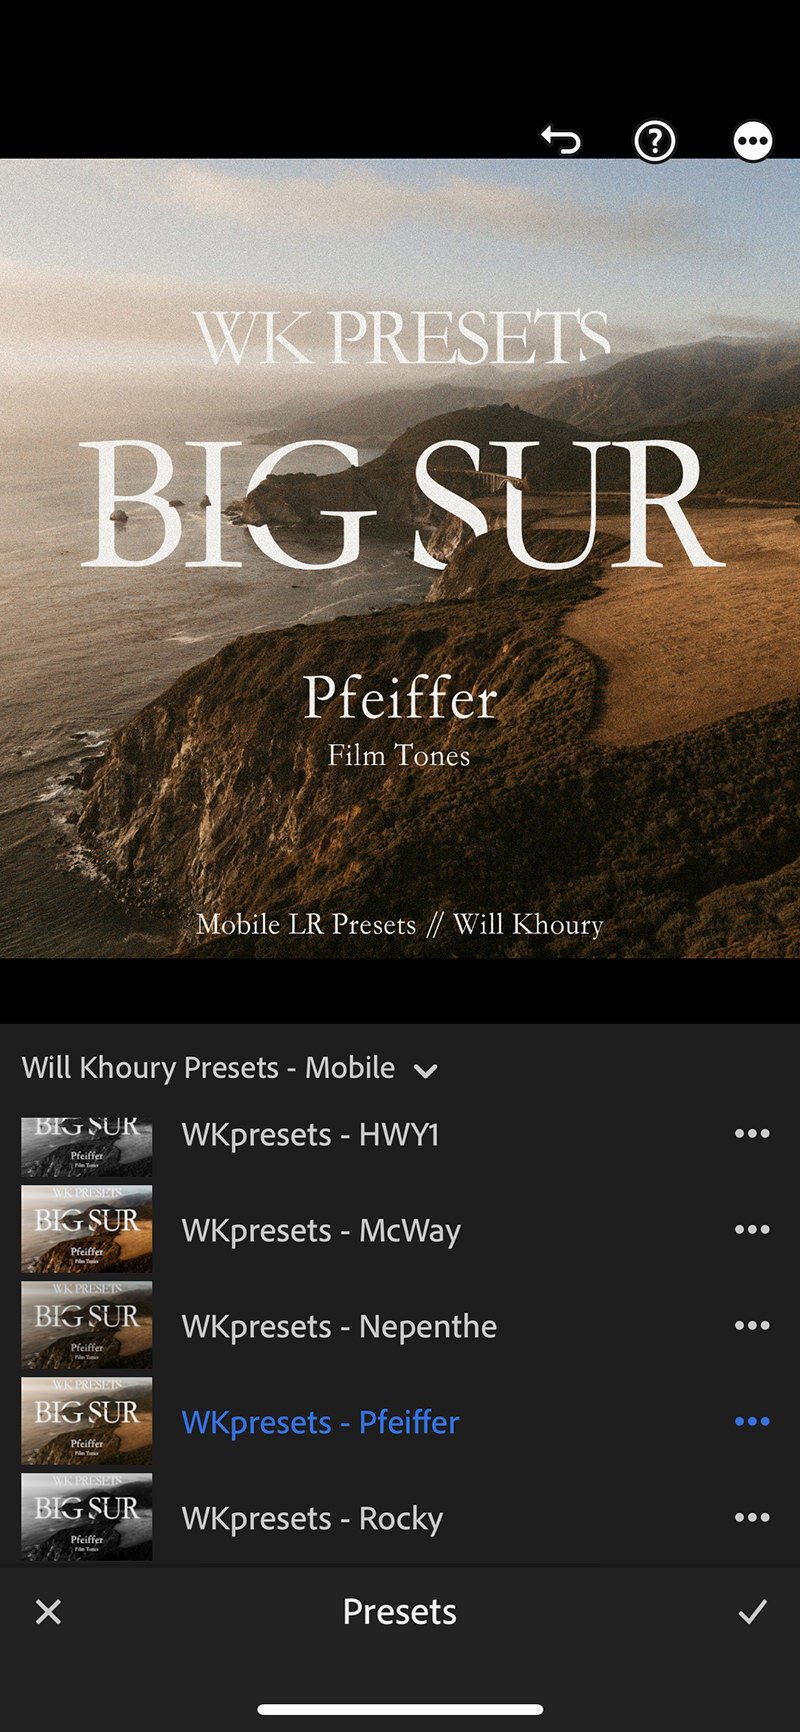
Swipe the tools tab at the bottom till you see the “Presets,” icon (Make sure the “WKpresets” tab that you created is selected).
The little icons will give you a preview of what your photo will look like edited using WKpresets.
Select the one you like
Adjust exposure and white balance to your liking.
Here’s a reference to what each Big Sur preset will do.
WKpresets - HWY1 is for Film B&W
WKpresets - Rocky is for Moody B&W
WKpresets - Pfeiffer is for Film Tones
WKpresets - Nepenthe is for Muted Tones
WKpresets - McWay is for Color Pop
WKpresets - Garrapata is for True Tones
WKpresets - Bixby is for Warm Tones
Step 9: THAT’S IT!! YOU’RE DONE!!
Option 2: How to Install Lightroom Mobile Presets on desktop
This option is mainly for those who have a Lightroom CC subscription with cloud storage from Adobe.
Step 1: Unzip the files
The first thing that you’ll need to do is download & unzip the “WKpresets - Big Sur” file.
Step 2: Lightroom CC
Open Lightroom CC, and make sure you’re online and syncing your cloud storage. For this, you have to log in to your Adobe Cloud account from LR.
Adobe Lightroom> Preferences> Account.
Step 3: Develop/Edit Module
In the develop module, select Edit (E). Your editing tabs will open up on the right side and at the bottom of the page, there will be a “Preset” button. Select that and another sub-menu will open up.
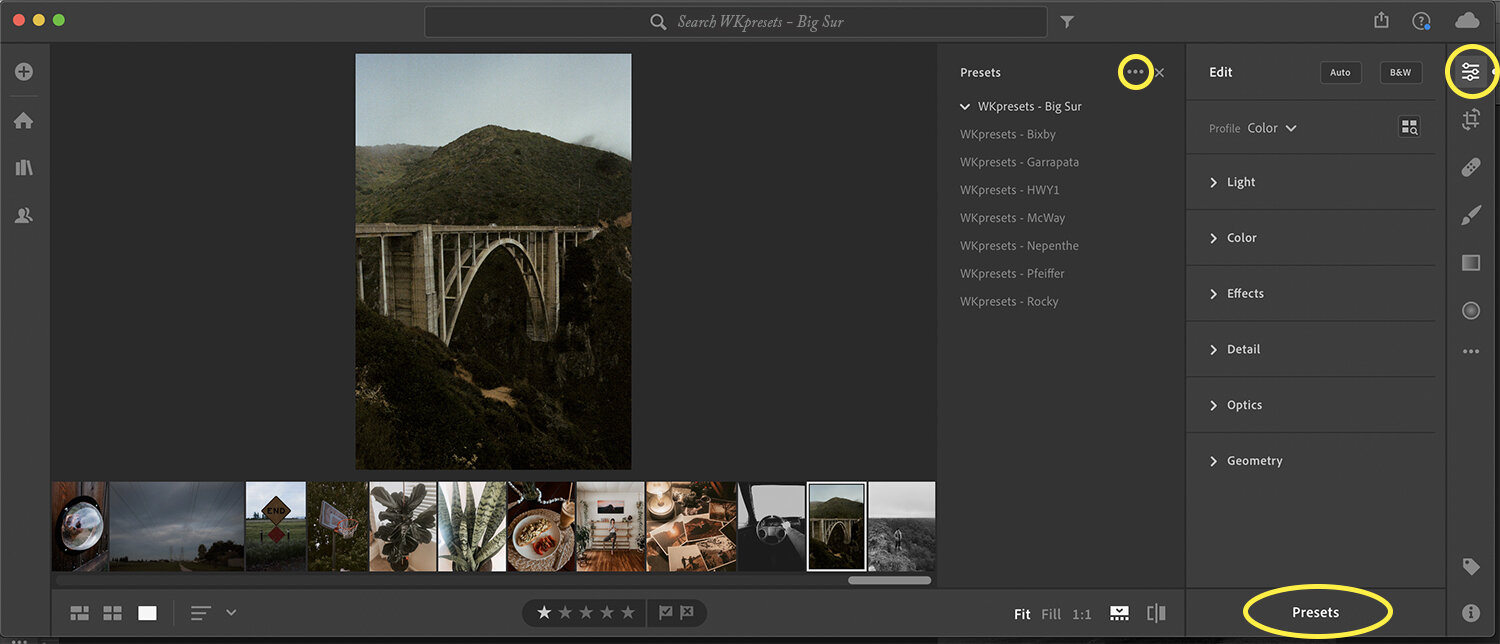
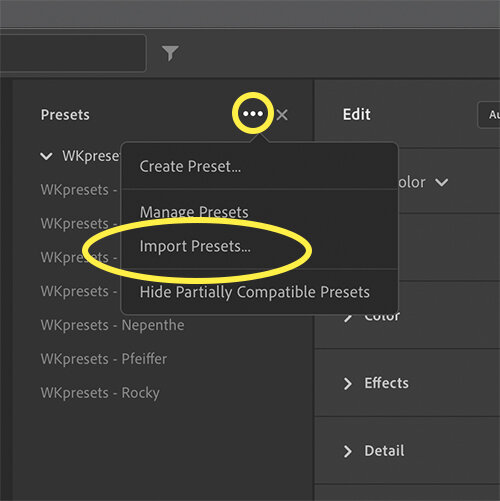
Step 4: Importing WKpresets
On the top right corner of the Presets tab, select the 3 dots “…” and then select “Import Presets”
Step 5: Locate your files
Find the downloaded folder that you just unzipped and located the .XMP files.
Step 6: Organizing your presets (optional)
You can group your presets under one preset group, such as “WKpresets - Big Sur”.
This will help you with keeping everything in one place and not worry about them being scattered everywhere.
You can take it a step further and select “…” then Manage Presets and uncheck what you don’t need. Less clutter = faster workflow!
Step 7: You’re Done!! Easy Peasy.
This is what makes this an easier option. Once you have your Presets on 1 device, it’ll sync to all devices that use LR CC.
WKpresets - Big Sur

WKpresets Big Sur is designed for editing JPEG/HEIC photos.
WKpresets - Big Sur Pack includes 7 presets for the free version of Lightroom CC.
5 Color Presets
2 B&W Presets
*All digital sales are final